Quantcast
Channel: Heidi Horticulture
Viewing all 215 articles
Browse latest View live

Stolwijk Alpina Blue Clematis

$
0
0
There are disadvantages to having a shaded garden. Yet, this new cultivar of clematis has given a dark corner some real delight. Even without the flower, the contrasting yellow foliage is welcome in my garden.

Clematis alpina "Stolwijk" - Photo taken in early May. An early flowering clematis, with blue nodding blooms.

They hold this shape for about 2 weeks.

Then, when conditions are favourable - each bloom unfurls fully to reveal more beauty.


As the flowers age, the centre swells and reveals a lovely tuft of feathery seed heads. The outer blue petals will fall off and the seed head remains, adding textural interest until the autumn.
.

Update - Overseeding Turf with White Clover

$
0
0
Ok, it's now just over 3 weeks since we over-seeded the lawn with clover. (Here is that post.)  I am quite pleased. The clover germinated in 6 days - given the adequate rains and cooler temps. Happy with the quality of the seed germinating.
This was 7 days after sowing. Not yet showing their true leaves, the amount of germination coverage was ample.

Of course, fresh, soft garden soil is a direct attraction to squirrels. So be forewarned. They were digging away and making divots in the freshly seeded areas.

Not to worry, clover will spread rapidly, once established.

This is 14 days after seeding. The typical 3 lobed leaves (4, if I'm lucky :) are starting to emerge.

Sure, there are a few patchy areas left, but as these little guys mature, the plant will thicken and become dense. Yay!

Just 3 weeks later, the lawn is green and thicker. The topdressing of soil helped thicken the grass too.
Not bad, eh?
I will do a comparison of heat tolerance during the drought laden, hot summer...stay tuned.

Curly-Q Fasciation On Continus coggygria

$
0
0
Pruning out the dead wood this week, I noticed this peculiar stem.


Here, this smokebush (Cotinus coggygria) had one curly branch. Removed it to take a photo.

Fasciation has made tissue grow faster on one side, and then the other side (inner tissue) at a normal rate. This caused the curling effect. Cool.  Have a look at a previous post that explains, Fasciation.

Photo(s) of the Month - June 2014

$
0
0
Although Lily of the Valley have finished blooming earlier this month, I love how the flowers nestle into their leaves.


Dividing Juncus effusus - Soft Rush for Ponds

$
0
0
This winter had heavy casualties in many gardens. However, we thought this Juncus effusus was going to kick the can. Thankfully, it shows signs of vigor and in fact signs of necessary division.

Taken out of the marginal section of the pond, you can see it has clearly grown right out of the liner pot.
Not to worry, with sharp tools and some elbow grease, it can be divided and replanted.

First, cut the excess root mass that grows through the tiny holes in the pond pot. A tight toothed saw blade worked. Cut off any side shoots and if you can keep those with roots, they can become new plants for another pot.
Once free from the plastic pot, this is the tricky part. Either use the sharp saw and begin slicing the plant in half by cutting the root mass or, take two garden forks. Stab both forks in the middle of the root mass and pull apart; as shown above. It really helps to have two people doing this.
They generally come free with a little force.

If you want more, keep dividing. Remove any browned blades and any baby shoots that have little root mass left.
You must use a pond pot, or a pot with perforated holes dotted throughout for drainage and moisture to get in. Line with landscape fabric or pond fabric. Cut the liner to about 3 inches more than the pot and cut away any excess.
Add grit to the base and clay if you have access. This weighs down the pot and also allows for drainage.

Add a good layer of bagged pond potting compound. It's quite heavy and all the organic matter has nearly broken down. So as to not cloud the pond when submerging.
Place your divisions, giving ample room for further growth. Cutting back the blades will  prevent energy loss because of the root thinning that took place when dividing. Fill in the empty gaps with pond soil. Some pond books recommend inserting fertilizer tablets to help the plants grow. This plant fairs well with the above and as the original plant can attest, it grew out of its pot rather quickly. I really don't want to have to do this again...any time soon! ;)

Add more grit as a topping - preferably different grades. Larger stones are welcome, as they camouflage the pot when it's covered with water, plus the added weight is welcome. If you have fish in your pond, they love sucking up the tiny stones and spitting them out of the pot. Larger ones deter the fish from doing that.

Lay on top a good inch or so of grit. Tamp down. If you are buying grit in a bag, wash before using. This prevents the pond from clouding - especially if you have several pots to submerge.
Soak the pots before submerging. This also loosens any soil that would instead float to the surface. It prevents bubbling and helps to weigh down the pot, so they sink faster.
So, from one pot, 3 were created. They are submerged about 6 inches down. Perfect little edge for birds to hop along and find shelter when getting a drink.

Collecting Hosta Seeds: The Experiment

$
0
0
I have several hostas in my little garden. I love them. This one is 'June'.

Endless divisions have made my garden fuller and other folks happy. Yet, I have never attempted to germinate them from seed. Knowing their seed won't be like the parent plant, I still aim to try the attempt. I realize this may be a waste of time, yet - I'm itching to see if it works out. My garden is small enough to contain about 6 various hostas that flower at the same time. I want to see if cross-pollination has been successful. Late last summer, I witnessed wasps and bees go from one flower to another. Now let's see if I can grow some from seed.

Throughout September and October, I began to harvest the seed.

I waited to collect, until the seeds had matured on the stem.

This Hosta plantagenia has rather long seed pods, full of seeds.

Be sure to harvest the seed when the pods are beginning to dry out and turn like straw - just before the pods begin to spring open. Lay them out on a piece of paper for a few days to completely dry. Then mark an envelope for each variety.

Several pods have duds - these pale white seeds that have no embroinic component. Discard. Like maple keys, they have a winged portion and a seed tucked in the tip.
They look sort of like tadpoles. The trick to germination, is stratification when it comes to hostas. I learned this the hard way. My first attempt had zero results. The second attempt after stratifying the seeds, worked. This means, they must be cooled in storage before sowing. I left them in their little envelopes, in a sealed dry container in my little potting shed - outside all winter. The stratification initiates the seed to germinate. The potting shed gets freezing temps which help the seed to become ready for germination. The key is to keep them dry. I just placed them in paper envelopes and in a tin box.
In May, I gathered some toilet loo-rolls for this:
Cutting toilet rolls in half, I filled them with potting mix. Compacting the soil tightly in the rolls. Once the rolls are watered they can swell and fall apart, so I use string to keep them grouped. Here I just used stuff around the house. I only had enough viable seeds to fill 16 half rolls. This old baking tray will do the trick.

I examined each seed. Making sure they had a wing and a solid seed side. Taking the seed I placed them on the surface of the potting mix.
I put about 3 seeds per roll.
With the blunt end of a skewer, I tucked them in just beneath the soil's surface.
I marked each roll with a dot, differentiating between the varieties of hosta seeds I collected.
I tied them together, so they don't collapse as easily.
To add greater humidity, I made a tiny greenhouse tent. Sticking skewers into the rolls, I have made posts for the cover.

Until germination, I just want to hold in moisture and humidity. You can buy seeding trays with domes for this purpose, I just decided to use household items for the job.

I placed it in a warm window sill, in late May until the threat of frost was over.  Bringing it outside to help the process.

Within 4 weeks, this is the result:
Small little hostas emerged.

I thinned out the germinated plants, leaving the stronger, healthier baby hostas - 1 per each roll.
Within 4 weeks, they are now starting to look like mini hostas. Once they begin to show a second or third leaf, I lightly fertilized them with a 7-7-7 water soluble. No streaking or colouring, yet. Plain green as I suspected. Who knows...it may still happen.
Once they fill out these rolls, I will transplant into larger pots and see what nature reveals. Will update later in the summer. It certainly is a fun process. But if you want to guarantee true cultivar characteristics, then divide from the parent plant you like.


Fabulous Bird Bath - Renzo Cattoni

$
0
0

Gardeners know that birds are crucial to promoting a balance between insect populations and healthy plant life. Helping to attract birds to a garden is key. Adding just any old bird bath is the challenge.  Why not this one?

I am blessed to have creative people in my life. Renzo Cattoni designed and made this bird bath himself. I giggle every time I see it. Not only does it bring visual interest to the garden, it does attract hundreds of birds each season. I think it's fabulous.
The face is meant to enable smaller birds to stand in less deep water, as well as provide relief and visual interest. The finger/hand is used after the bird has bathed. Perching there to wiggle and dry off. The large basin size enables more than one bird to bathe at a time.
The detail is what makes me giggle.

We've had the pleasure to see Robins, Baltimore Orioles, Red Winged Black Birds, Yellow Finch, Cardinals...you name it!

Happy bathing birds. Great design, Renzo!


Clematis Wilt - Phoma clematidina

$
0
0
Clematis are some of the most beautiful flowering vines available to the avid gardener. However, several cultivars are prone to clematis wilt.

This newly transplanted clematis (moved this past spring) has shown signs of the wilt disease.

Rather a young plant, we waited for the flower buds to unfurl, but with the heavy rains we've had and humidity, the buds never got large enough to flower.

On closer inspection, the flowers were wilted and lost some colour.

The stem bearing the flowers at the base had the typical Clematis Wilt brown leaves.
Clematis wilt a few years ago was known as Ascochyta clematidina, but now it is classified under Phoma clematidina. A fungus which in wet weather, multiply by spores, creating blotchy lesions and eventually browning of leaves - making the plant wilt.

Even though the leaves at the tip of the stem are green, the base leaves are all like this.

The best route of action, is to cut back (as far back to the ground level) any stems and leaves that are infected. Do not compost the remnants. Destroy or remove. Re-situate the plant, if it is prone to dampness (frequent foliage contact with water).

Cut right back to ground level. No sense in letting any remaining leaves to infect other healthy ones.

This clematis was planted in a fair bit of clay soil. Adding compost and humus rich soil will help boost it back to health.

Clematis generally like to have "cold feet" which is a term used to describe cooler roots. Help clematis by shading the base of the plant. Planting the clematis slightly deeper than it is in the pot is wise. Make sure the roots are deep enough to keep cool. Planting a perennial or placing a rock over the root system is also beneficial.
While recovering, it's best not to let the remaining foliage get overly wet. You can't help the rain, but any additional waterings should avoid the foliage getting wet.

This is the stem in question. Discarding it, I have cut it in half. The wilt began at the base, slowly working its way to the tip. A sad shame, but thankfully, the wilt didn't spread to the other stems.


Perennial Plants For Shade - Part 2

$
0
0
Gee, I can see myself making several parts to this sort of post. There are so many choices out there. Not the run of the mill either. Choices like these:

Not your average shade plant. This Chiastophyllum oppositifolium "Cotyledon" has wonderful grape clustered, yellow flowers in early June. I don't grow it for the flowers, but more like a ground cover. Habit is rather low and quite tolerant of dry shade. Adds shiny leaves and different texture to garden.

Here is a close up of the flower cluster.


Foamflower, or Tiarella. This one is called Iron Butterfly. Love, love, love. Foliage is golden all summer and doesn't scorch in shade. Flowers come up in late May early June. Tolerates a fair bit of drought once established.

Epimedium davidii, or Bishop's Hat. Fabulous little columbine like flowers in late May, with semi evergreen foliage which....
...turn lovely shades of reds and bronzes with frost.

Viola cornuta "Bowles Black" - a dwarf variety, with purple/blue flowers. Foliage in spring is quite bronze purple, maturing to dark greens and a tinge of purple. Self seeds every where, but easy to hoe out if you don't want them. Great planted with Lysimachia nummularia "Aurea" beneath!

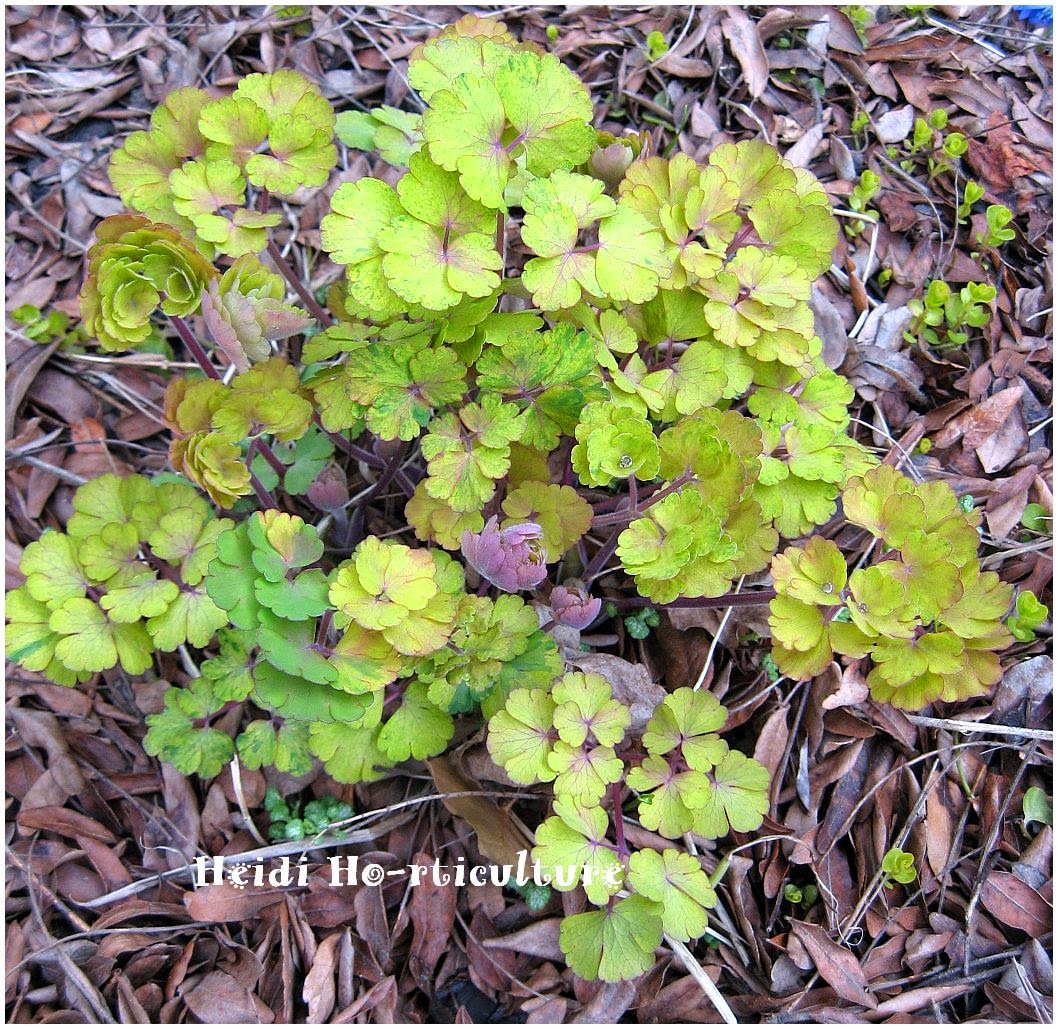
Alchemilla molis - Ladies Mantle. Nothing looks more glorious than leaves covered in dew on a  spring morning. Yellow flowers in June/July. Lovely paired with blue/yellow hostas. Can grow in a fair bit of sun as well.

Matteuccia struthiopteris, commonly known as Ostrich Fern. Lovely fiddle heads in spring (edible), unfurl into soft fronds. A bit of a runner. Must remove baby ferns in late spring to keep at bay. Great for dense shade and tough spots like under trees, or to cover an area quickly.

Tricyrtis - Toad Lily has long lily stems bearing orchid-like  flowers late in season (August-September). Real visual interest against evergreens or autumn changing foliage.

Anenome x hybrida "Honorine Jobert". Fall flowering Anemone. Some of the most delicate blooms that flower, standing above deep green foliage. Gently blowing in the breeze - they are stunning in masses.
More to come...

Photo of the Month - July 2014

$
0
0
Captured this Euphorbia polychroma in the evening, with some sunset twilight. Turned the grey-green foliage to blue. Every garden should have this plant.

Petit Faucon Clematis (Evisix)

$
0
0
All one's hard work gardening pays off at this time of year. When plants respond to your TLC, it's sooo worth it.

Petit Faucon Clematis
This herbaceous clematis nearly choked out last year. Having been smothered by overgrown shrubs and perennials, it nearly died. Heavy pruning this spring and resituated neighbours enabled this lovely clematis to bounce back with a great flush of colour.

This one is quite unlike the popular varieties out there.

Blue-ish yellow stamens age to deep yellow. Making lovely seed heads once the petals fall after bloom is over.


Unlike several climbing clematis, Petit Faucon (trade marked as 'Evisix') needs a little help to get rambling. Staking and tying up new stems is key to keep it from growing as a ground cover. Its leaves grow twice as large, weighing the growth down. Once upright, the new tips of the growth reveal lovely bell shaped flowers opening to  these 4 petaled, deep blue blooms. Quite unusual. The vine grew quite large this year, given the amount of snow coverage overwinter. Lots of moisture at the root level. Different in habit, this is a true eye catcher. 

Another beautiful feature: deep, shiny-blue bars on under-sided petals when in bell form.
Hint: Partner these herbaceous clematis with other vigorous upright clematis. With other varieties like: Jackmanii or Patens series, which bloom more towards the top.  You can train Petit Faucon to flourish below. This is paired with:

Clematis patens 'Miss Bateman'


Don't Throw Away That Garden Hose - DIY Fix It!

$
0
0
I was quite surprised the other day when I saw frustration in regarding a garden hose end attachment that leaked. The immediate response was, "we've got to get a new hose".

The yellow hose end has been bent due to frequent use. No longer makes a tight seal.
No, you don't need to get a new hose. Hose will just wind up in the land fill.

For those of you who don't know this, simply go to a nearest hardware store and pick up some new attachments. You'll need the following:

1.) hose end attachment (male or female)
2.) threaded clamp
3.) sharp pair of pruners (real sharp)
4.) flat headed screwdriver

Hint: You generally find clamps and hose end attachments together in packages. This is ideal.
First, cut the old end off with sharp pruners. If there is a leak in the hose at this point, cut beneath the hole to fix.

Make as flat of a cut as possible.

Before anything else, thread the clamp over the hose end before you proceed. Push it down the hose about 6 inches, so you have room for the next step.

Take the new brass fitting end and place at the mouth of the newly cut end. With the flat head screwdriver, insert it through both and...

...press firmly, so that the screwdriver presses it firmly down. Less strain on your fingers this way. Some hoses have tough rubber, hard to get the fitting in. If so, place end of hose in a hot bucket of water for a few minutes. This makes the rubber more pliable.

Push the brass fitting down, until the rubber meets the lip of the brass end.

Move the clamp towards the brass fitting, but not to the end of the rubber. Screw tight. You must leave a gap between the lip of the brass fitting and the clamp. The other hose end has to thread down over the fitting and sometimes it overlaps. Having the clamp too close, will not make a good seal.
Note:  it is important that you get the right clamp for the right hose thickness. Too large, and the clamp will make the end too heavy and when tightening, it will damage the rubber. It's best to bring the cut off end of the hose to the hardware store and get the best fit. No two hoses are alike.

No more leaks! 
Sometimes, there is more frustration buying new rigid hoses that are hard to recoil and wind up again. Reuse and fix your hoses before you give up on them.


Perennial Plants For Shade - Part 3

$
0
0
Here's the third installment of Perennial Plants For Shade:

Amsonia. Star shaped blue flowers flower in June. I'm partial to blue in the garden. Not many shade tolerant, blue perennials flower in June. This one is a keeper.
Meadow Rue; Thalictrum aquilegifolium - great for height and textural interest. May require staking in dense shade.

Brunnera macrophylla- this is the plain green variety.
Brunnera flowers are like forget-me-nots. Real hardy and fairly drought tolerant.

Gallium odoratum; Sweet Woodruff. Great ground cover. Flowers at end of May into June. Easily controllable and favours both sun and shade. Fragrant blooms.

Rescued this Aquilegia Vulgaris 'Leprechaun Gold'; Vareigated Columbine from the left over perennials at Canadian Tire. Bought this entirely for it's spotted variegation. Has beautiful double blue flowers to boot.
Columbine have dense habit when first emerging in spring. Loose, habit once in flower. Why buy green varieties, when you can get this spotted variegation! Can seed every where. Easily transplantable.

Helleborus x Gold Series. Evergreen and one of the most beautiful flowering perennials come spring (some varieties flower in autumn).

Pulmonaria angustifolia; Lungwort. Lovely bell shaped flowers in early spring, ranging pink to blue in colour.
Great substitute for hostas.

With silvery...

...or spotted foliage. Best planted in masses.

Convallaria majalis; Lily of the Valley.  A runner, spreading quickly, but great as a ground cover. Fragrant flowers.
Still more to come....

Check out previous posts: on Perennial Plants for Shade - Part 1 and Perennial Plants for Shade - Part 2

Planter Designs - Plant Combinations That Work

$
0
0
I've been blessed with a job that allows you to play with living colours.

A few principles govern plant placement, but for the most part it's light requirements and colour that dictates what can work.

Rules to follow when buying choices for planters:

1) "Thriller" (generally something with height and colour)
2) "Filler" (fills in gaps and provides interest)
3) "Spiller" (the overflowing growth that softens edges and makes the container blend in with the plants)
4) Contrasting colours

This square planter is quite tall off the ground - nearly 3.5 feet. So height is key, plus a lot of spiller. 
The above container is in part sun with the following:  Canna (centre), African marigolds, lime Coleus and Pennisetum rubrum grass (filler) and blackie and lime ornamental potato vine (spiller).

I find with larger containers, you need more fillers and thrillers to gain interest.
Given that the above planter gets full sun all day, I used 3 Cannas in the centre, African marigolds and Blaze Lantana as filler, with bronze Sweet Caroline and lime ornamental potato vine, purple verbena and wave petunia as spiller.


Not all containers have to have annuals - this one has a mixture of both perennial and annual selections.
More for part shade, the height in the above container is achieved with Rudbeckia goldstrum, fillers are: Angel wing Begonia, Silver Dusty Miller and Astilbe (textural leaves). Both Lamiastrum Jade frost and Lamium Pink Pewter is used as a spiller. In zones 6 and higher, the perennials in this planter will overwinter quite nicely.


Whether you have large scale plantings or small, a really tiny, shallow terracotta pot can still support larger sized plant material. Here I used two shades of Coleus in the background, Angel Wing Begonia as filler and a Lobelia mix for the spiller. Great for a shady spot.
Texture is important too - the grass in the centre give real height and movement in the breeze. Symmetrically placed, the plants really compliment each other.
Plants used: Arundo donax (grass), Ageratum (blue), Lime Potato vine, Red potato vine and balcon geraniums.

Symmetrical and asymmetrical ways are easy to accomplish:
Make sure you give adequate room for growth. Before you design layout - take into consideration if you have all around views or flat sides (up against buildings..etc).
 
Using grasses that have soft plumes help add visual interest from far. (Grass: Pennisetum setaceum)
This asymmetrical design enable the grass not to overtake the rest of the plant material. Depending on the grass, you need to make sure it doesn't smother the others.

Sometimes in shade, it's difficult to find tall thrillers. Add an obelisque and a climber or trailing plant to achieve height in the centre. Here, I wind Lamiastrum Jade Frost in the centre for height.

You can get a lot of colour even without flowers. Mix foliage colours for contrast.

Sometimes, less is more. Sticking to 3 different plants makes a bigger show.
Have fun with all kinds of choices. The garden centres have heaps of plants to choose from!

Photo of the Month - August 2014

$
0
0
Softest foliage ever - Plectranthus argentatus 'Silver Shield'. Grown in several of my containers this year. Just got to love the beauty of each fussy leaf up close.


Fish Bowl In The Garden

$
0
0
I wish I could build a pond in my tiny garden, but with a huge Gleditsia (Honeylocust) tree planted on the fence-line, yikes - it would be a lot of work to keep clean and too shady to attempt. I love watching fish swim about and see living plants grow in water. Relaxes me.

My compromise:

Found this great flask/terrarium at Pier 1 Imports. Made in Spain, it's quite durable - with rather thick glass (weighs a ton without the water), I thought it was the perfect choice for my new fresh water pets: "Goldie"& 'Gorbie".  I've seen other terrarium style glass bowls and such but all made from glass too delicate for outside. This one is perfect.

The small spouted neck will prevent unwanted animals and birds from attempting to grab my fish.  Big enough to provide air, to access and clean.

I've added two fresh-water, living plants:
Hornwort - ferny plant and Duckweed - lime green butterfly floaters
Both plants will oxygenate the water and Goldfish eat Duckweed, when nothing else is available. (Great back-up food source for weekend getaways).
Portable enough so that I can take it inside come any change in weather. Still need to find a perfect stand but for now, it nestles into my planters.
Because Hortwort floats, best to get sinking Goldfish food. That way the fish don't have to tangle and fight with plant life.

To help clean the terrarium, this little fresh water snail will help a lot.
I chose goldfish for their tough ability to withstand temperature ranges and for their colouration. 'Goldie' stands out quite well, to give visual interest.

Was glad to find 'Gorbie' (named after Mikhail Gorbachev :) isn't he/she cute?

Best friends.
This would be great for condo/apartment balconies too.


Look for Gypsy Moth Egg Masses In August

$
0
0
Please, if you have any hardwood shade trees on property you own, or property you frequent, take a look at this photo.
Beige, almost cotton-like, fuzzy masses are on hardwood shade trees right now.

These are egg masses laid by the Gypsy Moth (Lymantria dispar dispar) . It's an invasive species of moth (brought over from Europe) which can devour and devastate tree canopies all over the GTA. Eventually, when populations of Gyspy Moth get out of control, they weaken trees and reduce our tree canopies in urban situations.

August is the time Gypsy Moth lay their eggs. I've seen egg masses 6 inches to 10 feet off the ground on nearly all sides of a tree's trunk. It's been said the Gypsy Moth favours the south-east side (more protected) but not always.
Here, the mass has been placed approximately 10 inches off the ground level.

You may not see an egg mass, but instead the pupae skin remaining. This means the adults are close and perhaps in a few days masses will show up on the tree.

Here, below the egg masses (by the raised bark) you see pupae cocoons nestled on the trunk of a Gledistia (Honey Locust).

I just wore gloves and wiped the masses off. Simple. Remove any pupae too. The egg masses have a hairy fibre which has been known to irritate bare skin. So don't use your bare hands.

Each mass must have100 eggs, if not more. Fibrous, paper like vomit covers the eggs in a protective mass, incredibly making them safe for overwintering. Quite remarkable, really.

I was lucky, I found this female Gypsy Moth - having just laid her mass of eggs. Females are flightless, so she just sat there while I grabbed the camera. Pale beige/white in comparison to the male moth, she is larger and will die shortly after laying the eggs.

On this walk alone, I found masses on young trees, 50ft trees and even small fruit trees. Cultivars as: Tilia (Linden), Gleditsia (Honey Locust), Quercus (Oak), Malus (Apple) and Acer (Maples).

Don't be afraid or grossed out. If you see a mass, just take a leaf from the tree or a small stick and squish the soft mass of eggs and wipe away from trunk. You'll be doing the trees a big favour and the environment.

The tree will THANK YOU by having lovely, intact leaves next May-June (when the caterpillars emerge to feast). If we do this more often, less chemical and biological controls need to be sprayed from helicopters above.

Have a look at the Invading Species website for more info on the Gypsy Moth.

Update - Overseeding Turf with White Clover

$
0
0
Here's an update of our patchy turf situation this spring (click here for the original post).

Just delighted with the results.

The White Clover is doing well. The sidewalk edges are green and lush, when for years, dog urine and salt damage left burned edges - grass never took.

All the patches have grown in with clover. Clover flowers have bloomed and with mowing, have been sheered back to green again.

The clover is actually much greener than the grass right now, given the last two weeks have had little rain.

It's even stronger and outgrowing the few spots of quack-grass.


All in all, we're truly happy with the results.


Stumped - Possible Tradescantia?

$
0
0
Stumped on this fella. Nestled near a fence-line, in complete shade. Tiny, singular flower bloom on the tip and look like a face if you have my imagination. Stands about 8 inches off the ground. Lily like foliage.  Me thinks it belongs to the Tradescantia family, but it's only a hunch. Any ideas???

With one last internet search, I found it. It's a Commelina communis. First time I've ever seen one. Flowers apparently last for one day. Glad I caught this before it completely wilted.

Perennial Plants For Shade - Part 4

$
0
0
More shade loving choices:

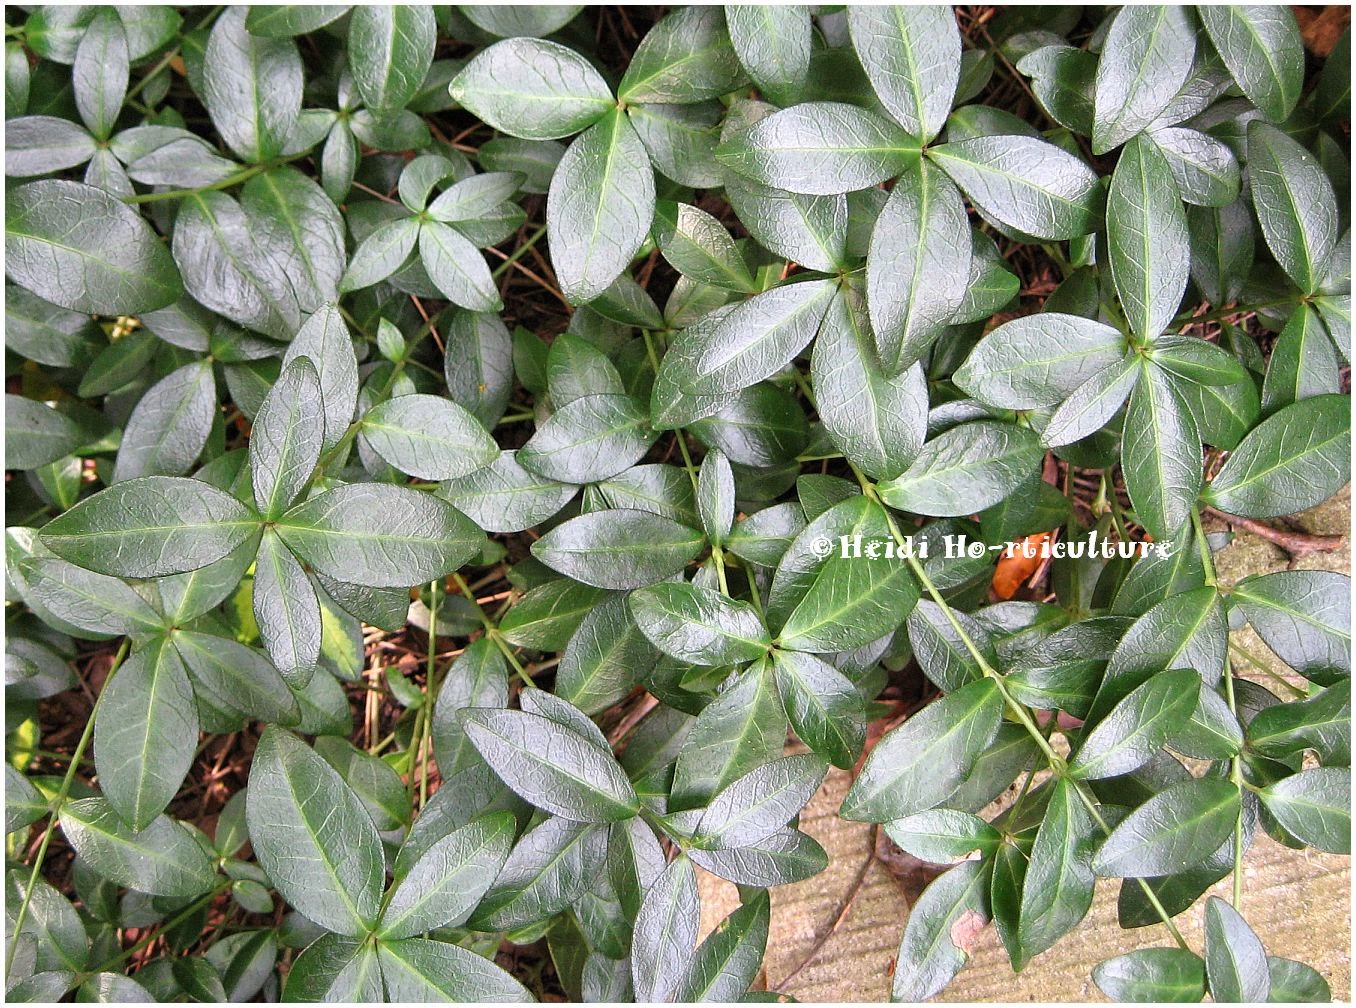
1. Vinca minor - Evergreen Ground Cover. Excellent for adding texture, sheen and coverage. Can be invasive if left un-manicured.

In May, dainty star-shaped, blue flowers emerge with new foliage.
Vinca minor "Illumination" - variegation is quite vibrant, but slow to grow.


2. Ligularia stenocephala "The Rocket" - great for moist soil conditions. This plant needs adequate spacing as well, but there are dwarfer, more compact varieties of Ligularias...

....such as: Ligularia dentata "Osiris Fantaisie" - bronze foliage in spring and early summer, paling to green. Lovely yellow daisy flowers in late August. If you have slug problems, this is slug bate (as you can see).

I do like its contrasting foliage in spring and the daisy flowers. They help bring colour continuity to the garden by flowering along side my Rudbeckia.

3. Heuchera villosa "Caramel" - So many choices of Heuchera are out there. I love this "Caramel" variety of Coral Bells for its contrasting colour and red leaf undersides. Stands out from a distance. White pinnacle flowers in July.

Shades from brown, to red, to plain green - there is a Heuchera or Heucherella for any garden. Here, bronze foliage, with burgundy pinnacle flowers make a great selection against lime green and blue hostas. So many cultivars to choose from.
4.Echinacea purpurea "Magnus"- ok, this plant is so versatile. It grows in full sun to shade. In shade, the flowers last longer, but the coneflower is slightly smaller and the colour is not as vivid. Yet, bees love this plant and so do I. I find the newer introduced cultivars require more sun. The original 'Magnus', does quite well.

5. Euonymus fortunei "Emerald Gaiety"  Whether you grow this as a shrub or climber, it tolerates a lot of shade.Here, I am training it as a vine. Again, many cultivars are available in shades of green and gold variegation - all evergreen.
Growing along a trellis....

...or used as ground cover. This cultivar is called, Coloratus Winter Creeper. Purple/Bronze winter foliage.


6. Ajuga repens "Chocolate"  Great ground cover with blue flowers in Spring. Several other cultivars available too!


Still more to follow.

Here are the other three posts prior to this one: Part One,Part Two and Part Three.
Viewing all 215 articles
Browse latest View live